Set up Stripe Terminal
Verify the merchant payment account and selected counter reader before using card tenders.
On this page
Before you begin
Open Connections → Stripe Terminal.
Owners and managers; account authorizations may require the owner. Company feature access and current setup requirements apply.
Step by step
- 1
Review the merchant account
Check account verification, environment and any required provider setup. Use the shop’s authorized payment account.
- 2
Select the intended reader
Review the supported reader list and location. Check that the selected device is the one customers will use.
- 3
Review payment readiness
Resolve the checklist for account, reader, permissions and shop approval. A visible account or reader is not enough for live capture.
- 4
Verify a permitted rollout
Follow the approved test and acceptance procedure for this shop and reader. Once ready, take payments through the sale’s current quote.
On the screen
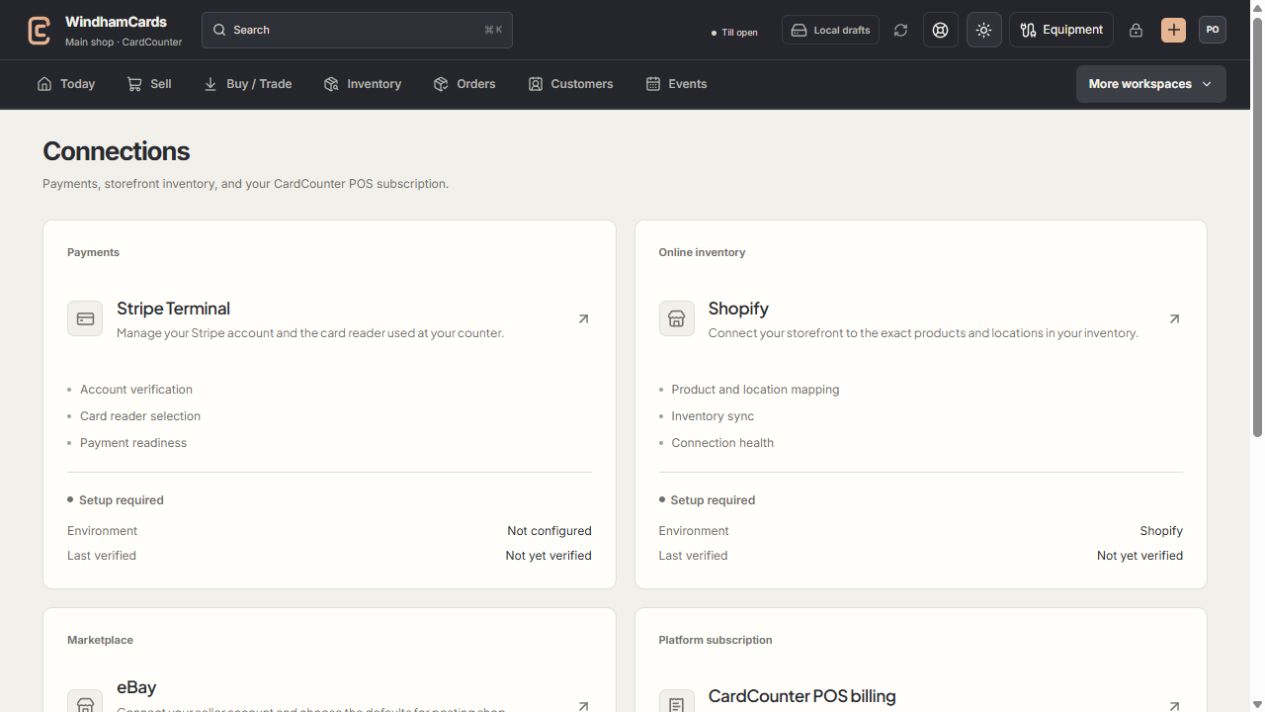
- 1Provider setup
Open the service you intend to configure or review.
- 2Status and verification
Environment and last verification are part of readiness.
- 3Separate billing
Platform billing differs from counter payments and seller postage.
Keep in mind
Merchandise counter payments, event ticket payments and CardCounter subscription billing have separate readiness and records.
Do not enter payment-card numbers into staff notes or send them to support. Use the supported provider device and secure account flow.
If something goes wrong
The reader is unavailable
Check its network and assigned location, then refresh the connection. Reconcile an existing payment before starting another.