Give customers website access
Invite verified customers to their private account and revoke access when required.
On this page
Before you begin
Open Customers → Website accounts with permitted access.
Staff with customer access. Company feature access and current setup requirements apply.
Step by step
- 1
Verify the customer
Select the correct record and verify identity through the shop’s procedure before granting private access.
- 2
Issue the supported invitation
Use the account’s current invitation or access-code action. Follow its delivery method and expiry instructions.
- 3
Complete private activation
Have the customer follow the secure invitation or customer sign-in page. Keep activation codes and links out of shared screens and public messages.
- 4
Review or revoke access
Inspect the account status and supported session controls. Reissuing access or revoking sessions can invalidate older invitations and sessions.
On the screen
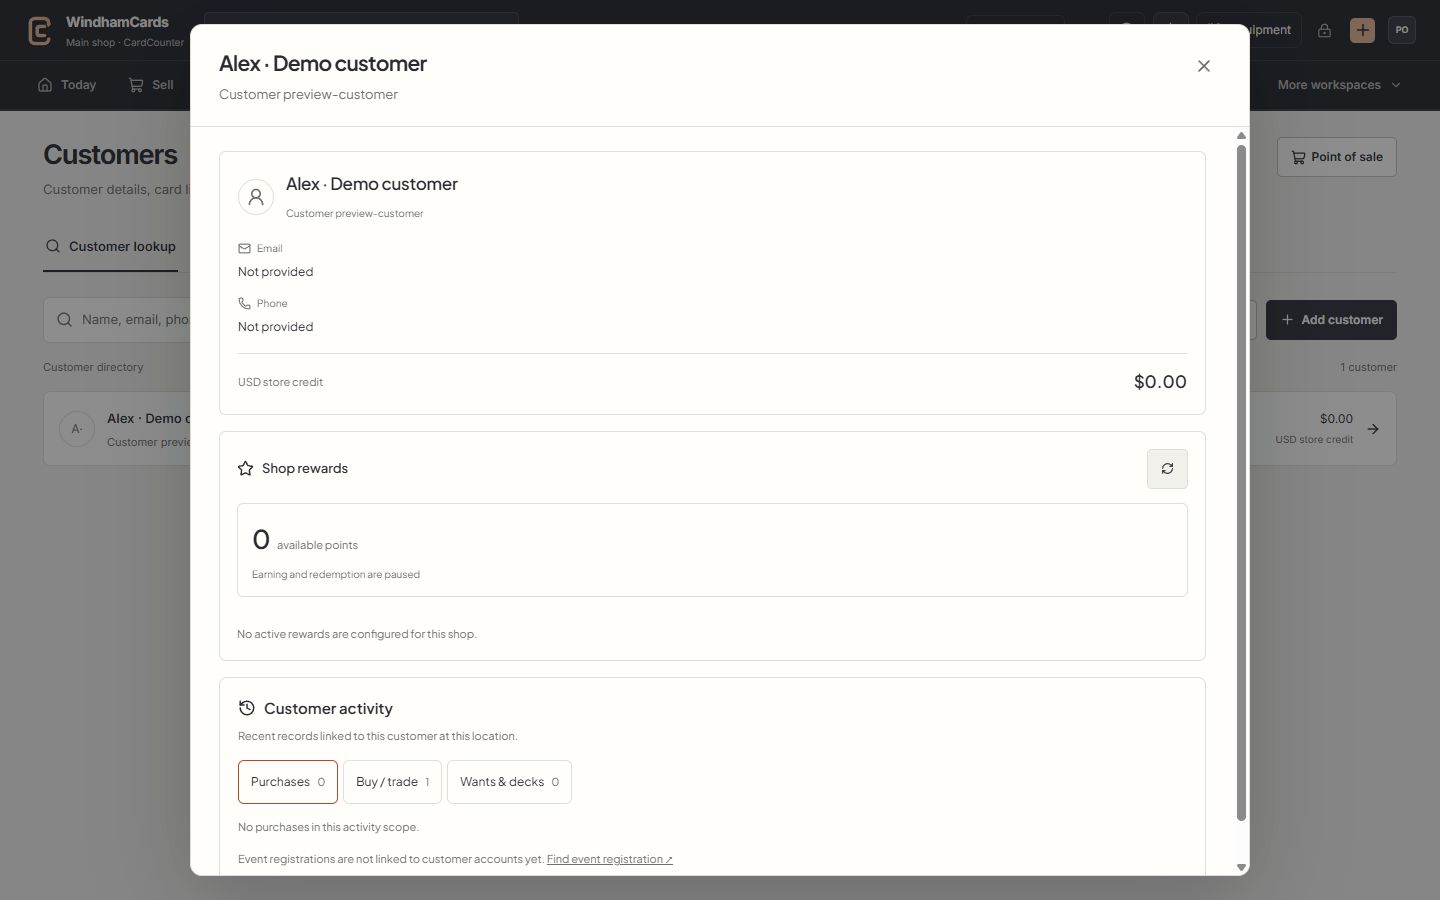
- 1Verified customer
Check the selected name and customer number before attaching a sale.
- 2Store credit
Read the recorded wallet balance and currency; rewards points are separate.
- 3Customer activity
Switch between purchases, buying records, wants and decks at this location.
Keep in mind
Customer accounts and staff accounts are different. A customer invitation does not grant staff workspace access.
An outbound invitation may depend on configured email delivery. Read the action result; do not assume an email was sent because a customer record exists.
If something goes wrong
An invitation has expired
Use the permitted resend or reissue action after verifying the customer again. Do not publish the expired code in a support request.