Start and complete a sale
Build a cart from exact products, review the current quote and confirm the recorded sale.
On this page
Before you begin
Open Sell after counter approval and the opening drawer count are complete.
Staff with counter access. Company feature access and current setup requirements apply.
Step by step
- 1
Start a new sale
Choose New sale or F2. Confirm the current register and location. Use the cart label or customer name to distinguish simultaneous customer drafts.
- 2
Find the exact item
Search by SKU, barcode, name or collector number. Check the printing, language, finish, condition and physical bin. Tap + or confirm Add to sale for the correct variant.
- 3
Review quantities and customer
Adjust the item quantity and attach the correct customer if the sale needs store credit, rewards or customer history. Remove accidental duplicate lines before payment.
- 4
Review and pay
Choose Review and pay or F9. Read the server’s current quote and any stock or price warnings. Select a ready tender and complete the confirmation appropriate to it.
- 5
Verify the receipt
Wait for the recorded sale result and open its receipt. Printing a receipt is a separate action; a printout alone does not prove the sale was confirmed.
On the screen
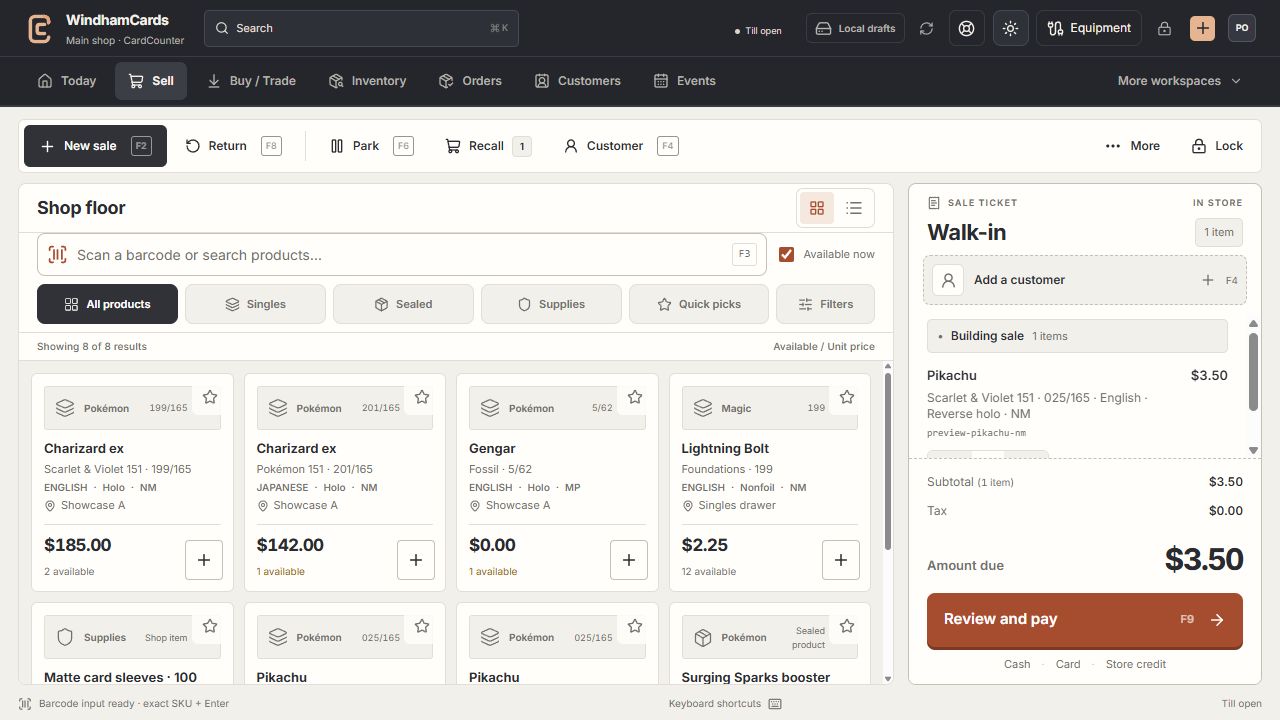
- 1Register actions
Start, park or recall a sale and open the customer panel.
- 2Exact product search
Search or scan, then confirm the printing, finish and condition.
- 3Sale ticket
Review the customer, quantities and current amount before payment.
Keep in mind
A stock or price change can require a fresh quote. Do not assume the first displayed total remains payable.
Scanning a product barcode adds an exact shop SKU; card-photo identification uses the separate Growth scanner.
If something goes wrong
An item cannot be added
Check that the exact SKU is active, priced, available at this location and eligible for sale. Read the displayed reason before substituting another printing.