Prepare and print inventory labels
Build a queue of exact SKUs, choose a label format and print a reviewed batch.
On this page
Before you begin
Open Inventory → Labels, or select exact products in Products & stock.
Owners and managers; stock visibility depends on role. Company feature access and current setup requirements apply.
Step by step
- 1
Build the print queue
Choose the intended products and set copies for each exact SKU. The screen states the current item and label limits; check the total before printing.
- 2
Choose a format
Select the supported preset or adjust the permitted dimensions, margins and content options. Check that the barcode and price correspond to the selected SKU.
- 3
Inspect the preview
Review long names, variant details and barcode readability. Test a small batch on the actual stock and printer you will use.
- 4
Print with the correct settings
Use the browser print dialog or supported equipment flow. Check paper size, scaling and headers or footers. Verify the first physical label scans correctly.
On the screen
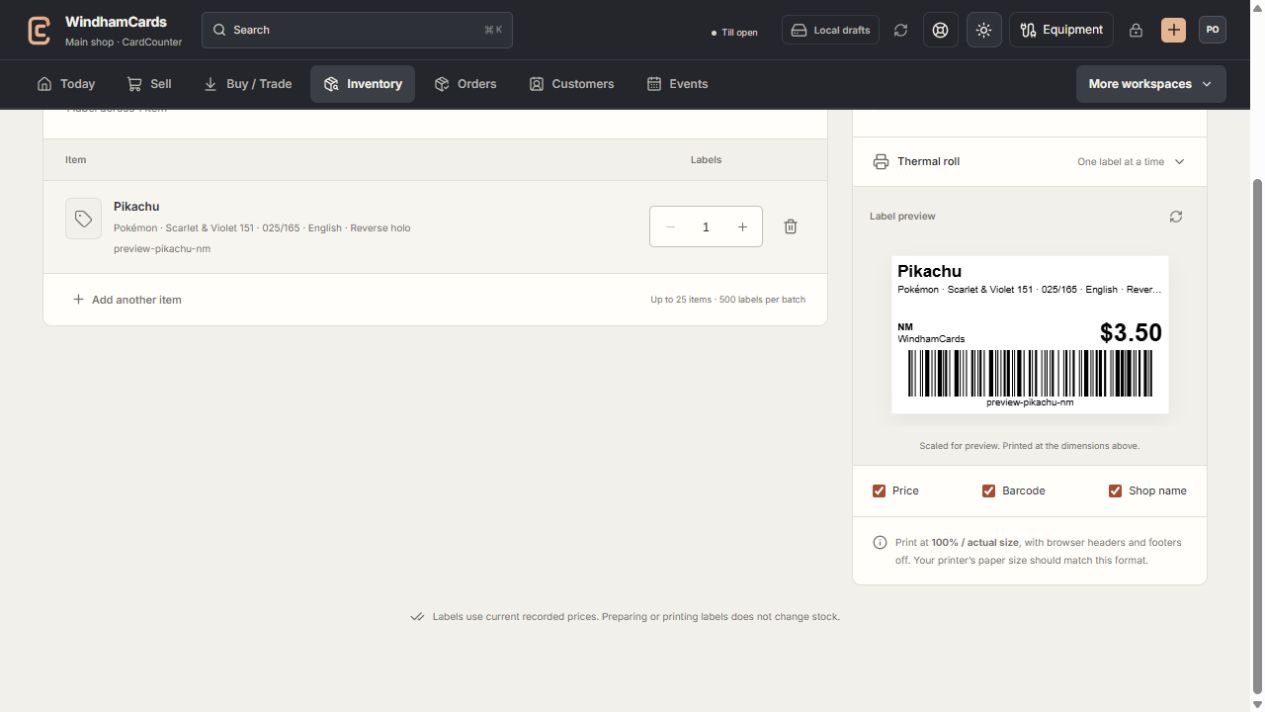
- 1Print queue
Choose exact SKUs and the number of copies to print.
- 2Printer and paper
Choose a matching preset and thermal or sheet layout before printing.
- 3Preview before printing
Check text and barcode readability on a small physical test.
Keep in mind
The print queue prepares labels; it does not change inventory or prices.
A supported label layout is not a promise that every printer or driver works. Test your device and chosen paper format.
If something goes wrong
Labels are clipped or the barcode fails
Check paper dimensions, scale and margins. Print a one-item test and verify the SKU at the register before a larger batch.