Transfer stock between locations
Track the exact items dispatched and received instead of directly editing quantities at both shops.
On this page
Before you begin
Open Inventory → Transfers with the source and destination locations confirmed.
Owners and managers; stock visibility depends on role. Company feature access and current setup requirements apply.
Step by step
- 1
Prepare the transfer
Choose exact SKUs, quantities and eligible source stock. Check the destination and handling note before dispatch.
- 2
Dispatch physical units
Use the supported dispatch confirmation only when those items leave the source location. Keep the transfer reference with the shipment.
- 3
Receive at the destination
Count actual received items and inspect their condition. Confirm the destination bins through the receiving action.
- 4
Review discrepancies
Follow the transfer’s recorded states for shortages, missing units or cancelled preparation. Check its history instead of adding a second opening receipt.
On the screen
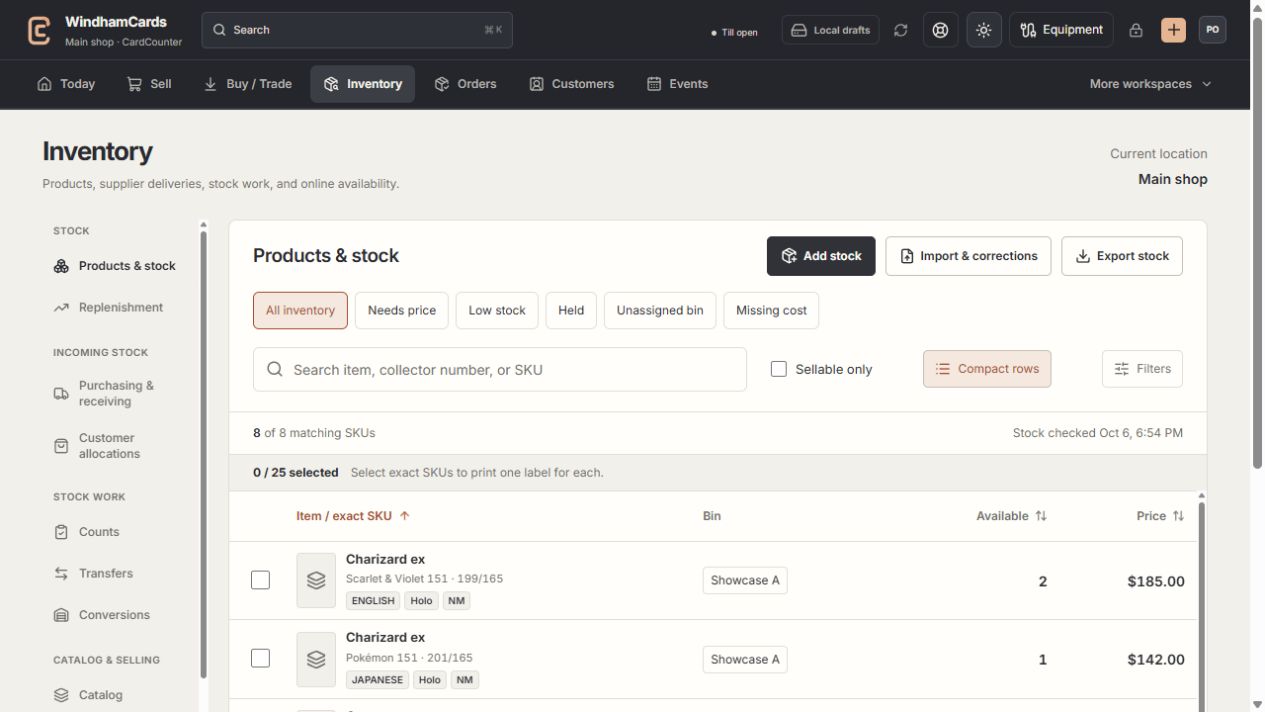
- 1Inventory sections
Move between stock work, pricing, channels, labels and scanning.
- 2Saved views and search
Find missing prices, low stock, holds or an exact shop SKU.
- 3Available stock
Read quantities and physical bins for the exact variant.
Keep in mind
Draft, dispatched and received transfers mean different stock positions. Destination stock is not available just because a transfer was prepared.
A transfer retains the exact product identity and its recorded cost basis where supported.
If something goes wrong
A quantity is blocked
Check source availability, active holds and the current transfer state. Reconcile previous dispatch or receipt outcomes first.