Your first day checklist
Prepare business details, approved policies, inventory, staff and the till before taking a sale.
On this page
Before you begin
Open Settings and work through Business details, Tax & returns and Counter setup.
All staff. Company feature access and current setup requirements apply.
Step by step
- 1
Save the real business profile
Enter the shop and legal names, location, full address and customer contact details. Check the information that will be printed on receipts.
- 2
Review operating policies
Save the tax rate and its source, return policy and time zone. Have the owner review the policy confirmation rather than using example values.
- 3
Review Counter setup
Saved business inputs and counter approval are separate. Follow the approval status for this location and register; green profile checks do not authorize transactions.
- 4
Prepare stock and people
Add exact SKUs, receive actual quantities into bins and check prices. Give each staff member their own account. Set up and verify any card reader or online connection you will use.
- 5
Count the opening float
Once the counter is approved, open Sell, enter the cash physically counted in the drawer and open it. Review your first quoted cart before payment.
On the screen
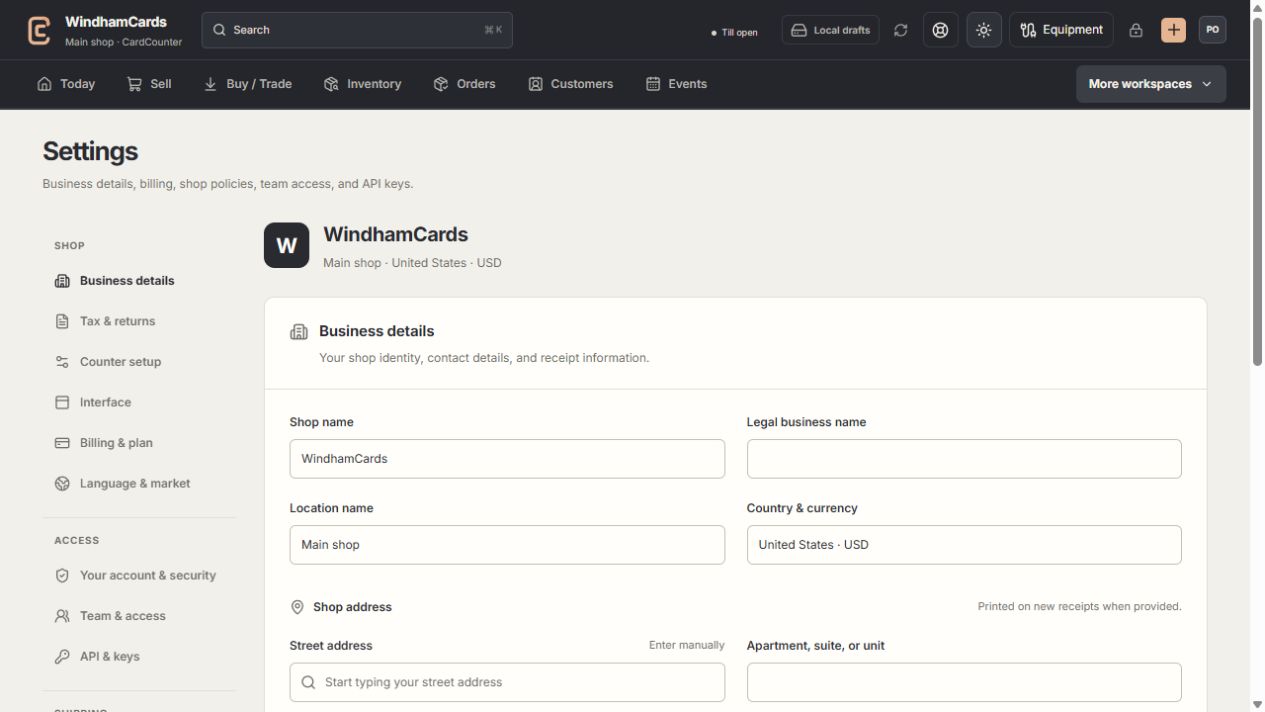
- 1Settings sections
Choose the business, policy, staff, shipping or device setting.
- 2Current values
Check the shop and location before editing a shared setting.
- 3Shop address
Complete the location address and contact fields, then save and read the result.
Keep in mind
Do not use documentation sample prices, tax rates or customer records as your shop’s operating settings.
An internet connection is required for confirmed actions. Local drafts can preserve item lists during a disruption; they cannot take payments.
If something goes wrong
Everything is checked but Sell is blocked
Open Counter setup and read the separate counter approval panel. Check whether approval is missing, pending, revoked or needs review after a profile change.