Set up your shop website
Understand the website workspace, saved drafts, published content and connected commerce.
On this page
Before you begin
Open More workspaces → Website.
Owners and managers with website access. Company feature access and current setup requirements apply.
Step by step
- 1
Read Overview
Check the assigned address, current publication and setup messages. Public visibility, indexing and commerce readiness are separate states.
- 2
Prepare the design and content
Use Design, Pages & news and Media to build the intended customer experience. Work in the selected draft version.
- 3
Connect permitted commerce
Review Storefront links and the merchant’s supported Shopify checkout. Publishing content does not activate payments or source stock.
- 4
Preview then publish
Check desktop and mobile previews, save the reviewed content and publish the intended saved version. Customers keep seeing the published version while you edit.
- 5
Verify the public site
Open the assigned or connected address as a customer and check navigation, product availability, event dates and contact information.
On the screen
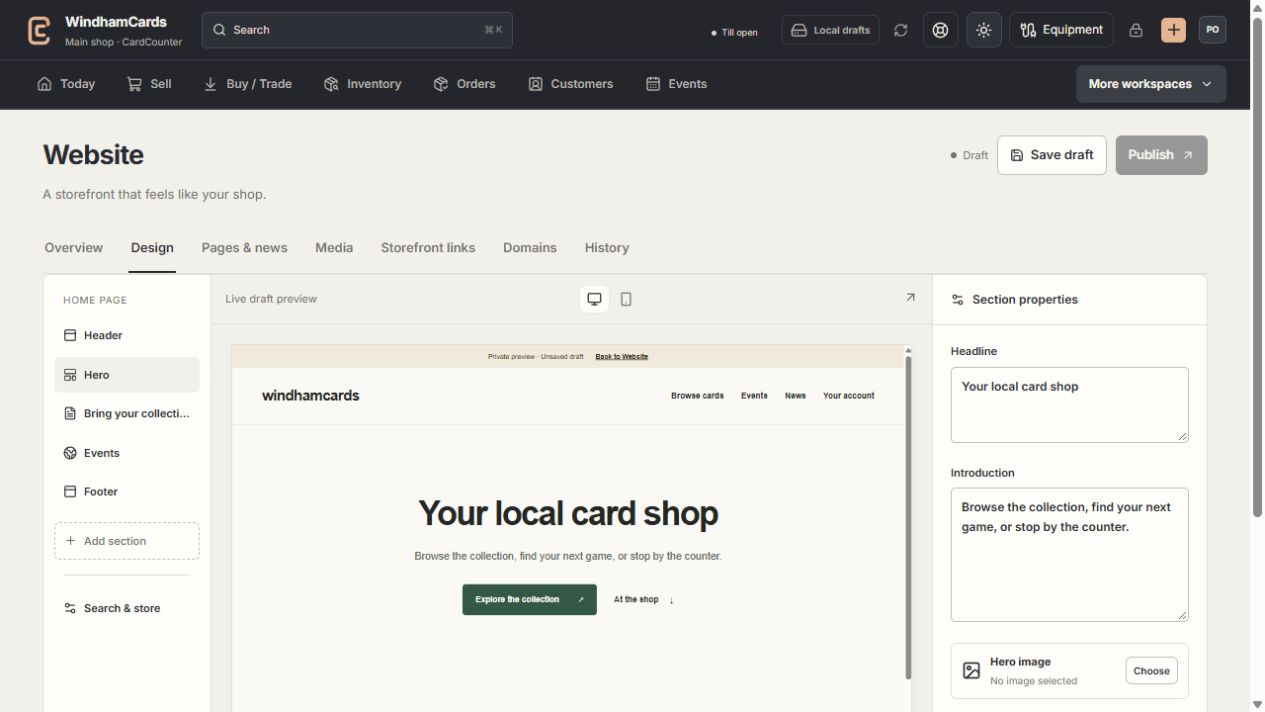
- 1Website tools
Design, pages, media, storefront links, domains and history.
- 2Section properties
Edit the selected section, then save and review the complete draft.
- 3Private preview
Check desktop and mobile before publishing the saved version.
Keep in mind
Website publishing and business profile saving are separate. Check customer-visible contact details and policies in the published site.
A connected custom domain must finish DNS and hosting verification before it is active.
If something goes wrong
The site is unavailable
Review its public-enabled setting, publication state, assigned address and domain status.