Use the customer display
Show the customer the selected sale’s item list and totals on a supported display.
On this page
Before you begin
Open the customer display tool from the register’s additional tools when enabled.
Staff with counter access. Company feature access and current setup requirements apply.
Step by step
- 1
Select the intended sale
Check the active register and cart so a different customer’s transaction is not displayed.
- 2
Open the display
Use the supported customer-display page or handoff and follow its pairing instructions. Keep staff tools and private account information on the staff screen.
- 3
Verify the visible total
Confirm that the customer sees the intended items and current quoted amounts. Changes in the cart should be reviewed on the staff screen before payment.
- 4
End the display session
Use the available close or reset control when the sale finishes or the screen is reassigned. Check the next customer’s display before continuing.
On the screen
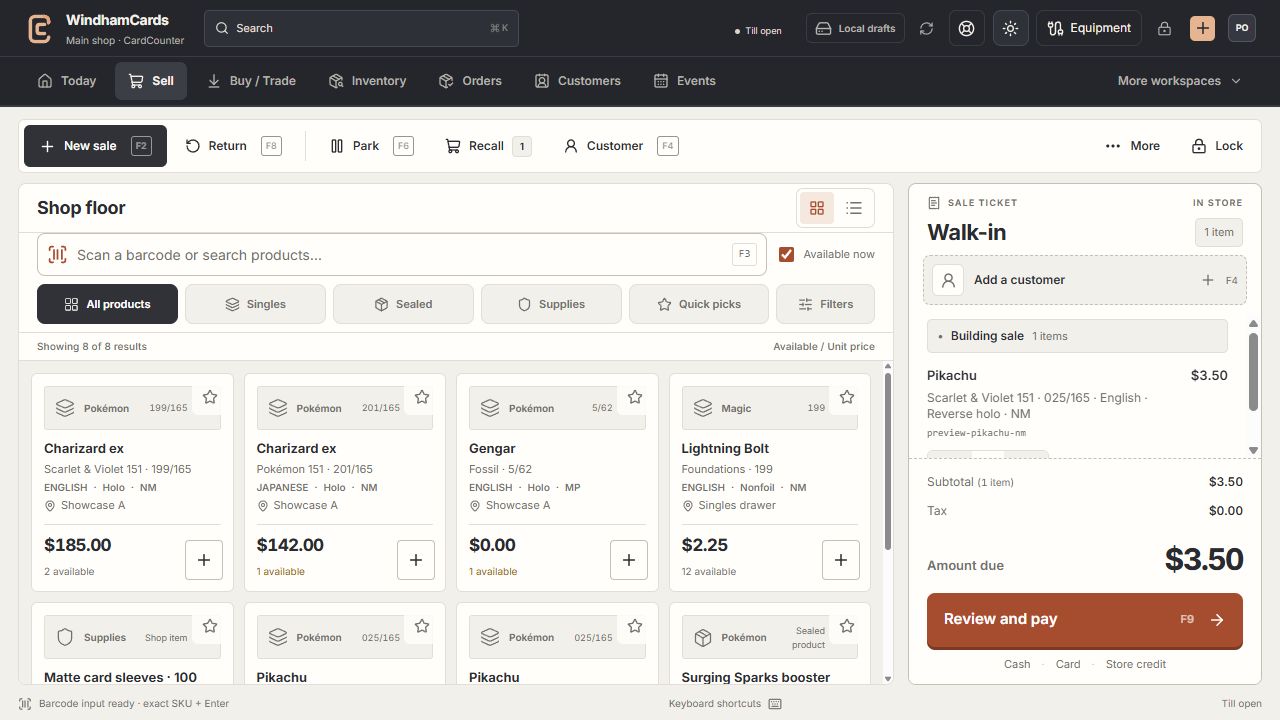
- 1Register actions
Start, park or recall a sale and open the customer panel.
- 2Exact product search
Search or scan, then confirm the printing, finish and condition.
- 3Sale ticket
Review the customer, quantities and current amount before payment.
Keep in mind
A customer display is a view of the sale, not independent authorization to change it or confirm payment.
Display availability depends on shop configuration and supported equipment. Test the chosen device before shop use.
If something goes wrong
The display is stale
Check its paired register, network and selected cart. Refresh the staff record and the display using the offered controls.