Create sessions and publish a calendar
Set event dates, capacity and public visibility while keeping session and website publication separate.
On this page
Before you begin
Open Events with management access to create or edit sessions.
Staff with event access; session changes require management. Company feature access and current setup requirements apply.
Step by step
- 1
Prepare the session
Enter the title, description, date, time zone and capacity through the supported session editor. Check the exact start time shown to guests.
- 2
Review repeated dates
Use the weekly scheduling controls where available and inspect each resulting date. Existing bookings can constrain later schedule changes.
- 3
Configure tickets if needed
Add supported ticket types and prices before accepting registrations. Ticket-payment readiness is separate from merchandise card readiness.
- 4
Publish deliberately
Review the Public calendar action and the shop website’s calendar settings. A private session does not become public merely because it exists in Events.
- 5
Review calendar and list views
Use the month controls or session list to inspect upcoming work. The calendar states its time zone and latest-session coverage.
On the screen
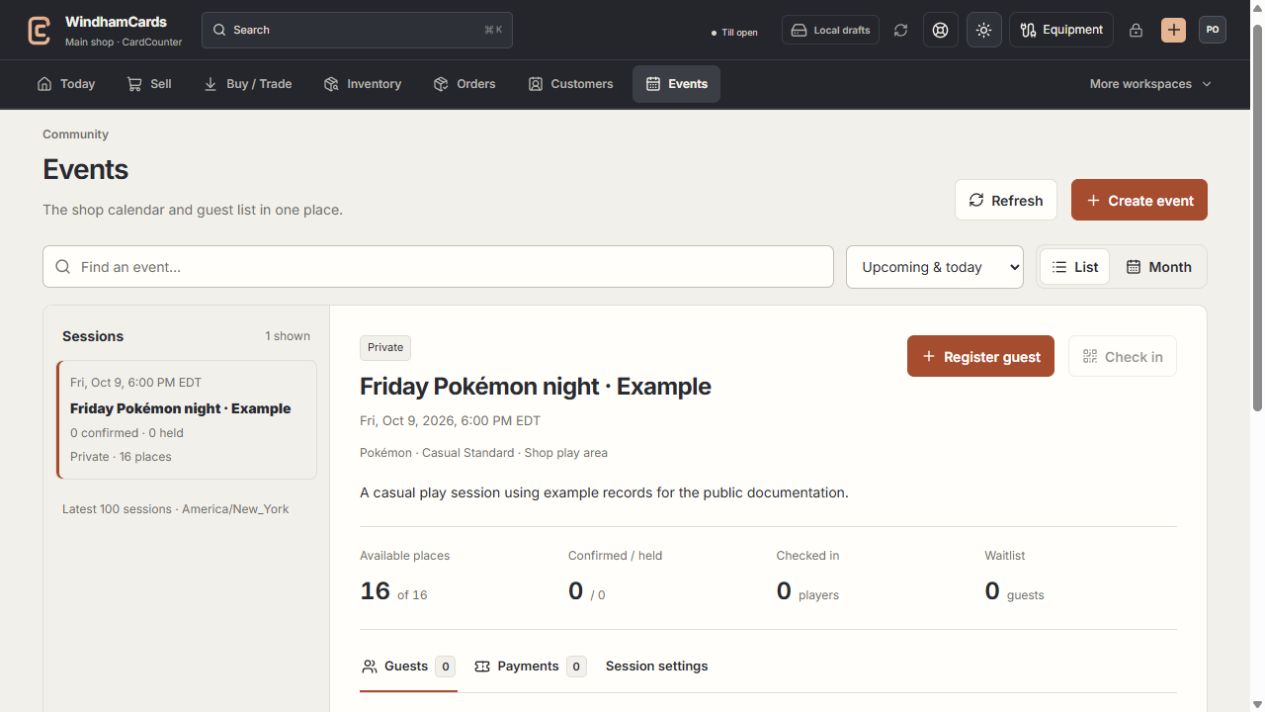
- 1Calendar or list
Find the intended session and verify the shop time zone.
- 2Session and guests
Capacity, held seats and confirmed registrations are separate.
- 3Manage sessions
Review scheduling, ticket and publication changes with management access.
Keep in mind
Changing a future session can affect existing guests. Use the change review rather than recreating their records blindly.
The latest-session limit means an older event may require a different date or search instead of being absent entirely.
If something goes wrong
The session is not on the website
Check session publication, public calendar configuration and the website’s published version.