Attach a customer to a sale
Find or create the customer associated with a cart and see why attachment may be unavailable.
On this page
Before you begin
Start a new sale, then open Customer or press F4.
Staff with counter access. Company feature access and current setup requirements apply.
Step by step
- 1
Search the directory
Search by name, email, phone or customer number. Read the customer number and contact details before choosing a similar name.
- 2
Create a record when needed
Choose Add customer and enter the verified details. Do not create a second record just because a slow search has not finished.
- 3
Attach the selected customer
Review the customer card, then choose Attach customer. Check that the sale ticket now shows the intended customer.
- 4
Review credit and rewards
The panel shows the available wallet, shop rewards and activity supported for this customer. A paused program or missing wallet has its own explanation.
On the screen
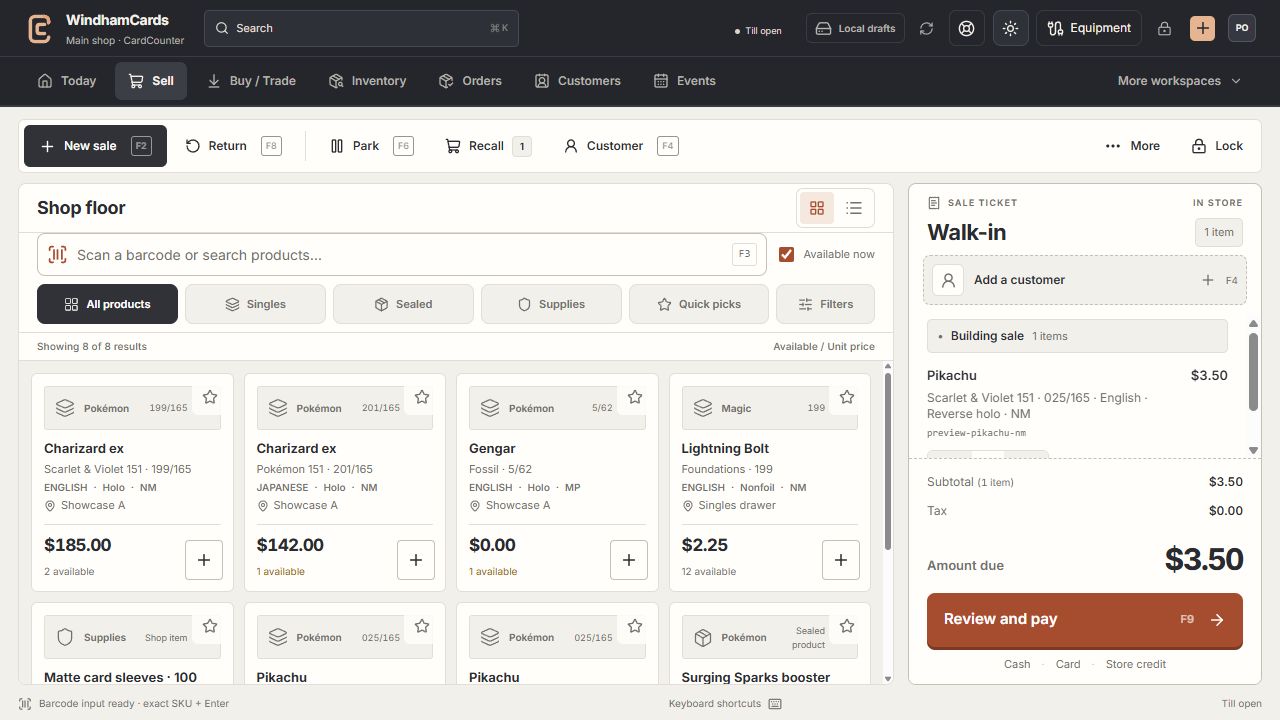
- 1Register actions
Start, park or recall a sale and open the customer panel.
- 2Exact product search
Search or scan, then confirm the printing, finish and condition.
- 3Sale ticket
Review the customer, quantities and current amount before payment.
Keep in mind
Attachment requires an editable sale. If there is no active sale, start one first.
Blocked actions show their reason on hover or focus and in the panel. A customer already attached to a completed sale cannot be changed through a new draft.
If something goes wrong
Attach customer is unavailable
Read the explanation near the button. Check that a new sale exists, the workspace is online and unlocked, and the customer is eligible.