Pay with customer store credit
Use the attached customer’s available wallet balance for an eligible sale.
On this page
Before you begin
Attach the verified customer to an editable sale and obtain a current quote.
Staff with counter access. Company feature access and current setup requirements apply.
Step by step
- 1
Check the wallet
Review the customer and currency. Available balance can be less than the recorded balance when existing credit reservations are active.
- 2
Choose Store credit
Select the supported credit tender and the permitted amount. Use split payment if another ready tender must cover the remainder.
- 3
Confirm the sale
Review the final amount and wait for the server confirmation. Store credit is consumed through the sale record, not by editing a customer note.
- 4
Review the history
Open the receipt and customer wallet activity to check the amount used. If the result is uncertain, reconcile the existing reservation and sale first.
On the screen
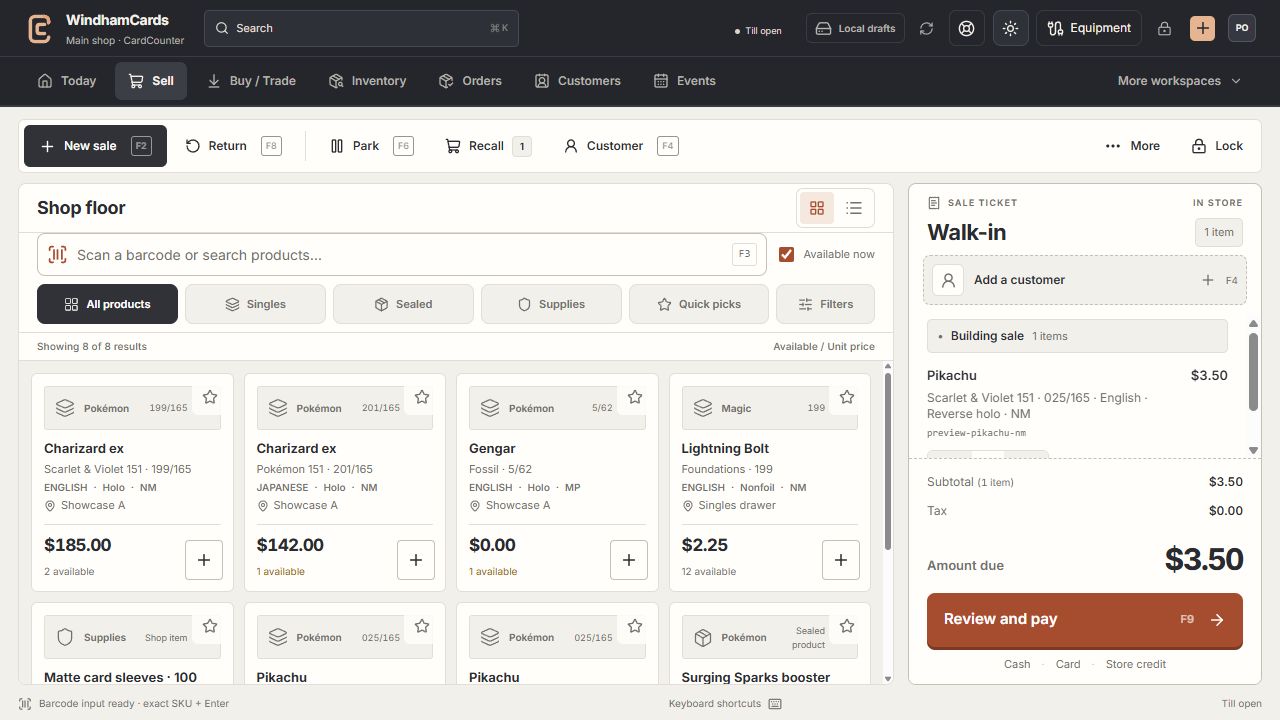
- 1Register actions
Start, park or recall a sale and open the customer panel.
- 2Exact product search
Search or scan, then confirm the printing, finish and condition.
- 3Sale ticket
Review the customer, quantities and current amount before payment.
Keep in mind
The customer’s points balance is not their store-credit balance. A reward must be redeemed through the rewards flow to issue its defined benefit.
Store credit at the counter does not imply automatic Shopify redemption. Online checkout support must be separately configured and verified.
If something goes wrong
The balance cannot cover the sale
Check currency and available funds, including holds. Do not issue arbitrary credit to make a checkout pass.