Connect storefront shopping and checkout
Connect customer product browsing to the merchant’s supported commerce checkout.
On this page
Before you begin
Open Website → Storefront links and Connections → Shopify.
Owners and managers with website access. Company feature access and current setup requirements apply.
Step by step
- 1
Verify product mappings
Confirm public products represent exact shop SKUs and eligible online quantities. An unrelated variant can sell the wrong physical card.
- 2
Review the checkout connection
Read the provider and payment readiness. CardCounter content hosting and merchant Shopify checkout have separate configuration and responsibilities.
- 3
Review delivery pricing
Choose and verify the merchant’s shipping and pickup rules in the actual checkout. A saved free-shipping preference alone does not change buyer rates.
- 4
Test the customer path
Browse the published site, select an eligible product and review the intended checkout destination without making an unapproved purchase.
- 5
Verify order intake
Confirmed supported channel orders appear through their connected order flow, where payment and fulfillment can be reviewed separately.
On the screen
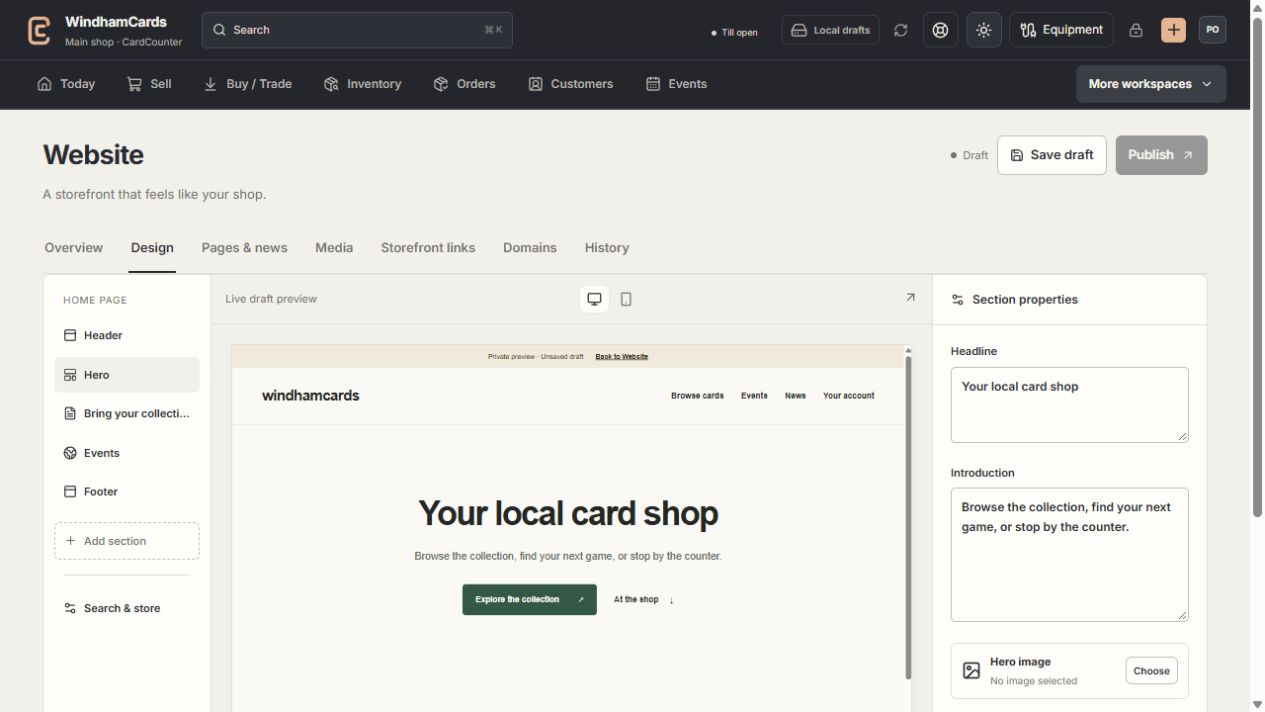
- 1Website tools
Design, pages, media, storefront links, domains and history.
- 2Section properties
Edit the selected section, then save and review the complete draft.
- 3Private preview
Check desktop and mobile before publishing the saved version.
Keep in mind
Publishing a website does not activate card processing, USPS payment access or automatic redemption of counter store credit.
Use a configured supported checkout. Do not create a manual payment workaround when the integration reports unavailable.
If something goes wrong
A customer cannot check out
Check public product eligibility, channel mapping, provider readiness and the exact checkout error.