Take a card payment
Use the configured Stripe Terminal reader and wait for the provider’s confirmed result.
On this page
Before you begin
Verify the Stripe account, reader, shop approval and card-payment readiness in Connections.
Staff with counter access. Company feature access and current setup requirements apply.
Step by step
- 1
Review the current sale
Check item quantities, reservations and the quoted amount. Select the configured card tender only when the workspace marks it ready.
- 2
Use the selected reader
Confirm the intended reader and follow its customer prompts. Keep the sale open while the provider handles the payment.
- 3
Read the payment result
Approved, failed, cancelled and needs review are different outcomes. Wait for the provider result to be applied to the sale before treating it as paid.
- 4
Reconcile uncertain outcomes
If a timeout or interruption occurs, review the existing payment and provider reference. Avoid sending a new charge until the earlier outcome is known.
On the screen
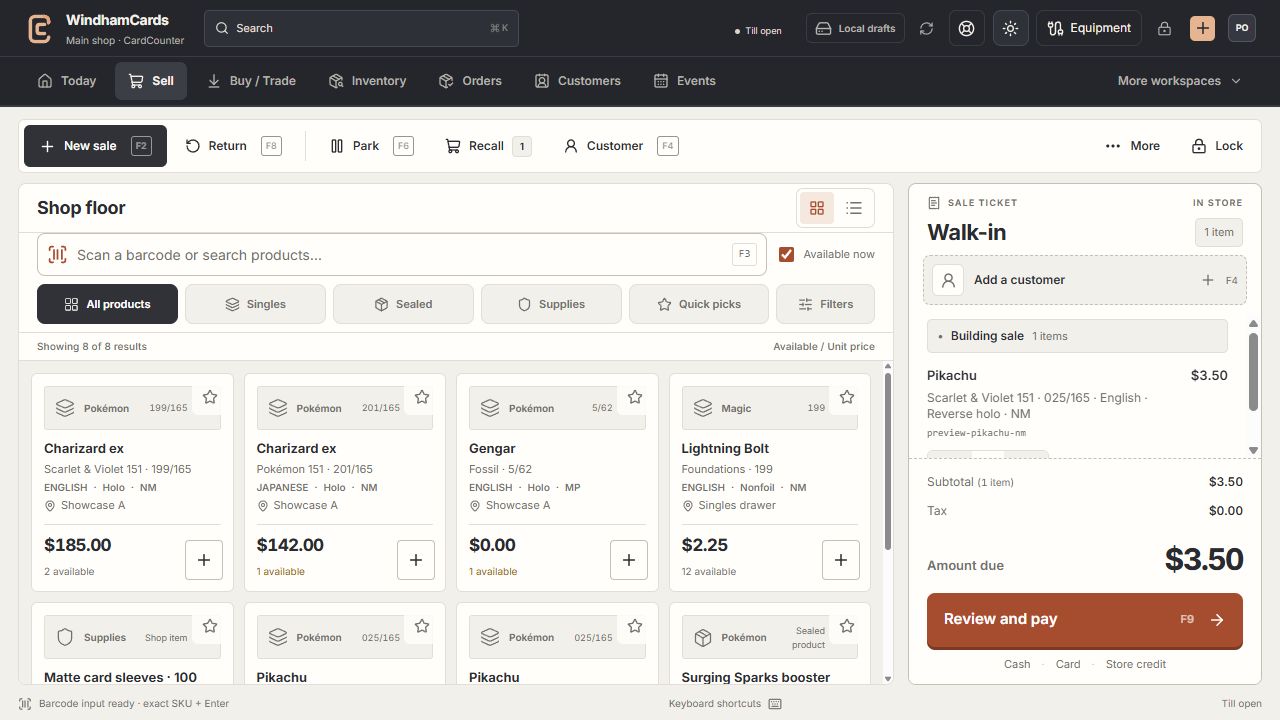
- 1Register actions
Start, park or recall a sale and open the customer panel.
- 2Exact product search
Search or scan, then confirm the printing, finish and condition.
- 3Sale ticket
Review the customer, quantities and current amount before payment.
Keep in mind
A connected Stripe account or visible card button alone does not enable live card payments. Provider verification and shop commissioning must be ready.
Cardholder details belong on the provider’s supported reader or secure flow. Never enter card numbers into an unrelated note or support message.
If something goes wrong
The reader does not respond
Check the selected reader’s readiness and network, then review the pending payment. Ask support with the non-sensitive payment reference if the result remains uncertain.