Connect a custom website domain
Follow the exact DNS instructions and hosting verification for your shop’s assigned domain.
On this page
Before you begin
Open Website → Domains with domain-management access.
Owners and managers with website access. Company feature access and current setup requirements apply.
Step by step
- 1
Review the assigned address
Keep a working assigned shop address available while a custom hostname is being configured.
- 2
Add the intended hostname
Use the supported domain form and review the exact hostname. Check ownership before changing its DNS provider settings.
- 3
Copy the provided DNS records
Use the exact record type, Name / host and Value / target shown for this hostname. Do not substitute a remembered address from another shop.
- 4
Check verification status
Waiting for DNS, Awaiting hosting, Connected and Removing are different states. Use the provided verification action and wait for the recorded result.
- 5
Verify the public address
Open the connected HTTPS address and confirm the correct published shop. Review removal impact before disconnecting an active domain.
On the screen
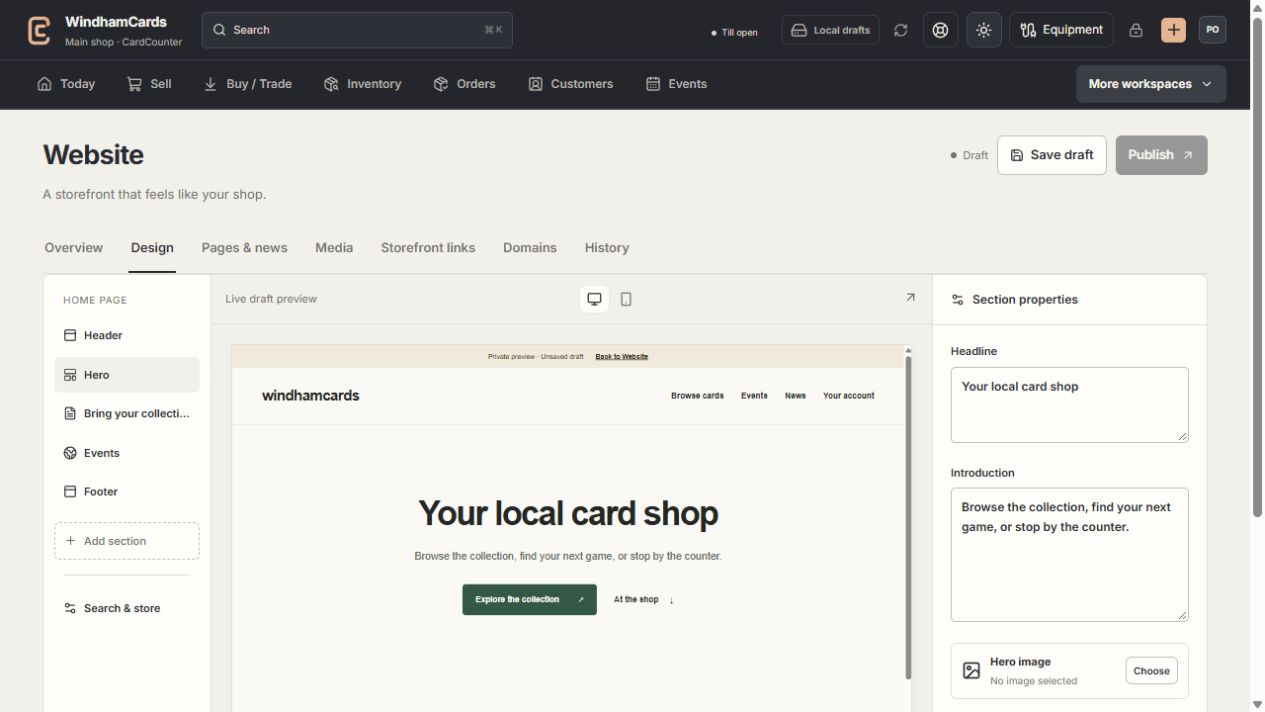
- 1Website tools
Design, pages, media, storefront links, domains and history.
- 2Section properties
Edit the selected section, then save and review the complete draft.
- 3Private preview
Check desktop and mobile before publishing the saved version.
Keep in mind
DNS propagation and hosting approval are outside the editor’s immediate save action. A saved hostname is not yet a connected domain.
Public-enabled and indexing settings are separate from whether a domain has verified.
If something goes wrong
DNS is still pending
Compare the current provider records with the exact instructions and check for conflicting records. Use the supported status check instead of adding repeated domains.